Receivers (Send Data to Pegasus)
How to send telemetry data from IoT Devices to Pegasus IoT Cloud
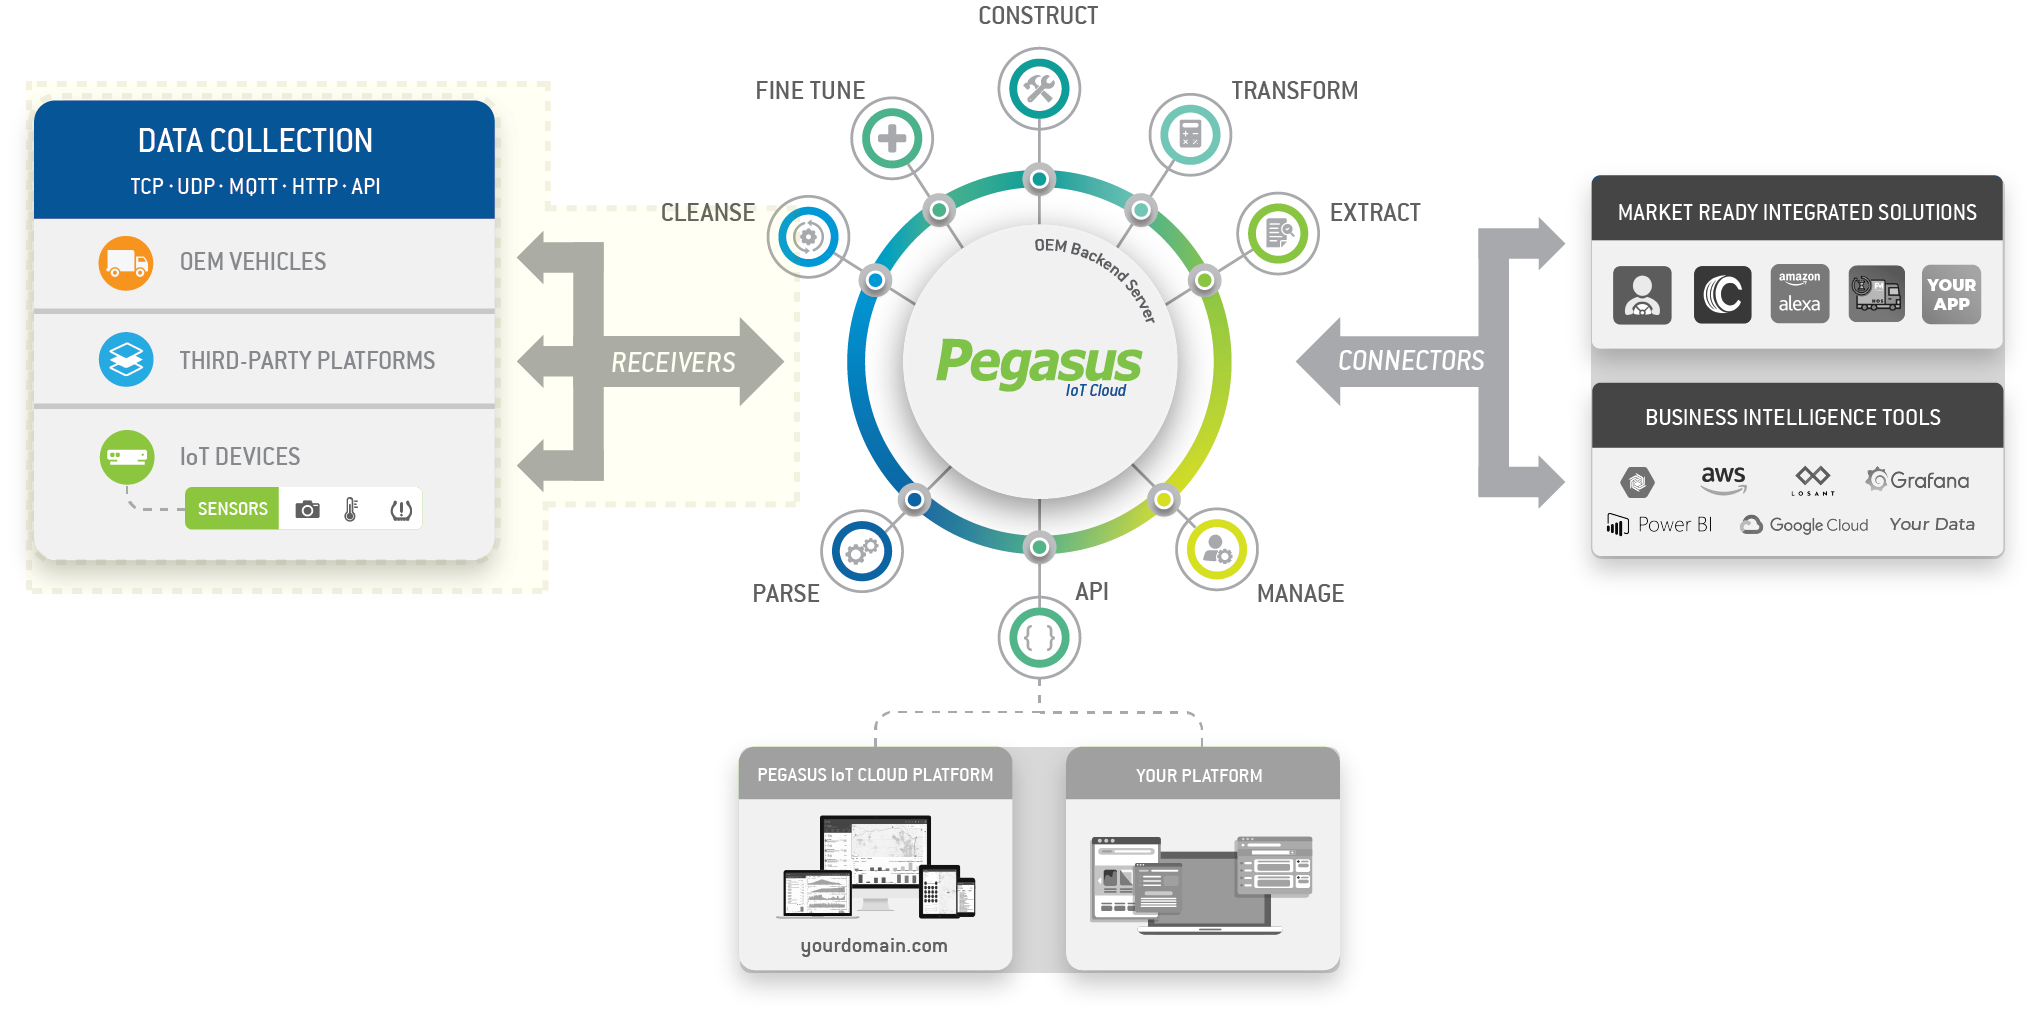
Pegasus can receive telematics data from various third party platforms or IoT Devices. You can send data containing basic location information or more detailed data, including engine or accessory-related information. Once the data is received in Pegasus, you can access it through the API and visualize it within the Pegasus Application.
There are two entities that can receive data, the primary entity also called vehicles or the secondary entity also called an asset.
Data Receiver for Vehicles
Send data that is associated to a primary entity type.
Please note that to begin receiving data from third-party devices via HTTP POST, you must contact our support team to add the device IMEIs or license plates to the Pegasus Site database.
Data Receiver for Assets
The first step to start receiving data for an asset is to create it.
curl --location 'https://api.pegasusgateway.com/assets' \
--header 'Authenticate: ENVIRONMENT_VARIABLE' \
--data-raw '{
    "first_name": "First Name",
    "last_name": "Last Name",
    "type": "test",
    "email": "[email protected]",
    "phone": 123456789,
    "groups": [
        108
    ]
}'curl --location --request PUT 'https://api.pegasusgateway.com/assets/3664' \
--header 'Authenticate: ENVIRONMENT_VARIABLE' \
--data-raw '{
"first_name": "New Name",
"last_name": "New Last Name",
"type": "test",
"email": "[email protected]",
"phone": 987654321,
"groups": [
108
],
"trafcker_mode": true
}'This will generate a unique token for that particular asset that we can use to POST data to. Example token: UTNZEHBL
Sample Response:
	{
  "__created": 1643918199.638594,
  "__updated": 1643919538.013488,
  "__version": "6.11.0-gm",
  "counters": null,
  "device": 450000108313474,
  "groups": [
    108
  ],
  "id": 3664,
  "info": {
    "email": "[email protected]",
    "first_name": "New Name",
    "last_name": "New Last Name",
    "phone": "987654321",
    "type": "test"
  },
  "name": "New Name New Last Name",
  "primary": null,
  "properties": {},
  "tracker": {
    "active": true,
    "asset_id": 3664,
    "device": 450000108313474,
    "site_id": 1,
    "site_url": "pegasus1.pegasusgateway.com",
    "token": "47U7ZSK9"
  },
  "type": "asset"
}
To prepare the asset to receive data we have to assign the device associated to this asset a configuration. This can be done with POST /device-config/:imei sending a key ky with the value s000
curl --location 'https://api.pegasusgateway.com/devices/450000108313474/configuration' \
--header 'Authenticate: ENVIRONMENT_VARIABLE' \
--data '{
    "ky": "s000"
}'
Response:
{
  "config": {
    "kydef": {
      "lumeway": false,
      "secugen": false,
      "garminmode": true,
      "safeimmo": false,
      "satcom": false,
      "_read_at": null,
      "photocam": true,
      "ios_names": "..."
    },
    "kymod": {
      "_epoch": 1659996350.890587
    },
    "total_count": 93,
    "_config_state": 1,
    "_epoch": 1659996350.926876,
    "ky": "s000",
    "devconfig_id": 27319,
    "pending": true
  }
}
Upload data
In order to publish telemetry data to Pegasus server, send POST request to the following URL:https://api.pegasusgateway.com/assets/event?tracker=:token
replacing :token with the token generated previously.
note that the POST is always made to 'api.pegasusgateway.com'
using server time
curl --location 'https://api.pegasusgateway.com/assets/event?tracker=47U7ZSK9' \
--data '{
    "latitude": 20.024853343483215,
    "longitude": -85.21733641366925,
    "mph": 20.5,
    "heading": 275,
    "altitude": 15,
    "distance": 12345,
    "label": "panic",
    "epoch": 1751075860
    // "use_server_time": 1 (deprecated)
}'
Response:
{
  "message": "event processed successfully"
}
Params:
| param | type | description |
|---|---|---|
| latitude | double | WGS84 latitude |
| longitude | double | WGS84 longitude |
| mph | integer | speed in mph |
| heading | integer | heading in degrees 0-359 0=north, 90=east, etc. |
| altitude | integer | device altitude in meters |
| [label] | string | event label (if not specified a trckpnt is automatically assigned) see list of labels |
| epoch | integer | epoch timestamp |
Updated 24 days ago