Trips
The trips module is used to get a historical view of the trips that your entities have made at any time in the past.
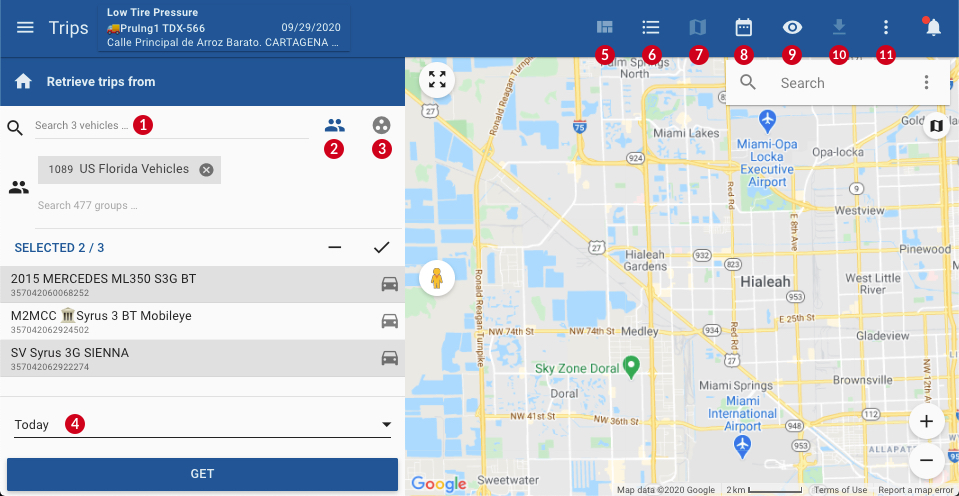
- Search for an entity
- Filter the list of entities by group
- Filter the list of entities by type of device
- Date range
- Change layout
- Hide/show the list
- Hide/show the map
- Hide/show the calendar
- Toggle peek mode, when active it shows the trip start/end locations when you hover over the trip
- More settings for the application
To get started, select one or many entities from the selector, and a date range. Then, click on the button “GET” to retrieve the trips.
Browsing
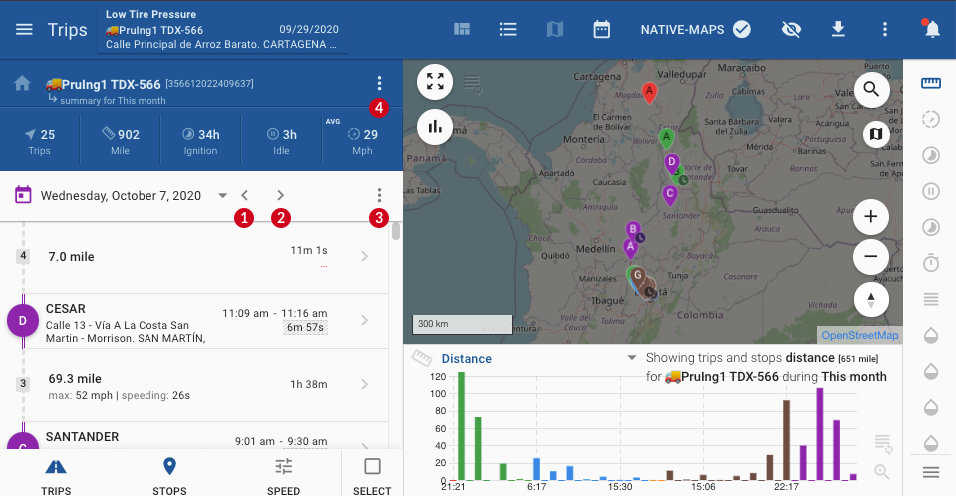
The list of trips can be changed to show only trips or stops or both. To do so, click on the icons along the bottom to switch between views.
You can also select a different metric to view for every trip by clicking the following icon:

For every trip, besides the distance and duration, the metrics can include:
- Speeding (max & time spent over speed)
- Idling (time & percentage)
- Acceleration (most aggressive acceleration/deceleration)
- Driver name
- Fuel consumed/wasted (consumed while idling)
Depending on the number of days you've selected, you can scroll left and right to navigate through those days. This allows you to quickly see the vehicle's locations for each selected day.
-
Go back a day: This function enables the user to navigate backward by one day.
-
Go forward a day: This function allows the user to advance forward by one day.
-
Controls for the day: This function provides specific controls or options relevant to the currently selected day.
-
Controls for all days: This function offers controls or options that apply to all selected days collectively.
Controls
The menu icon next to the date can be used to draw in the map all the paths and stop markers for the selected day.
The menu icon next to the name of the entity can be used to draw the paths of all the trips in all the days selected.
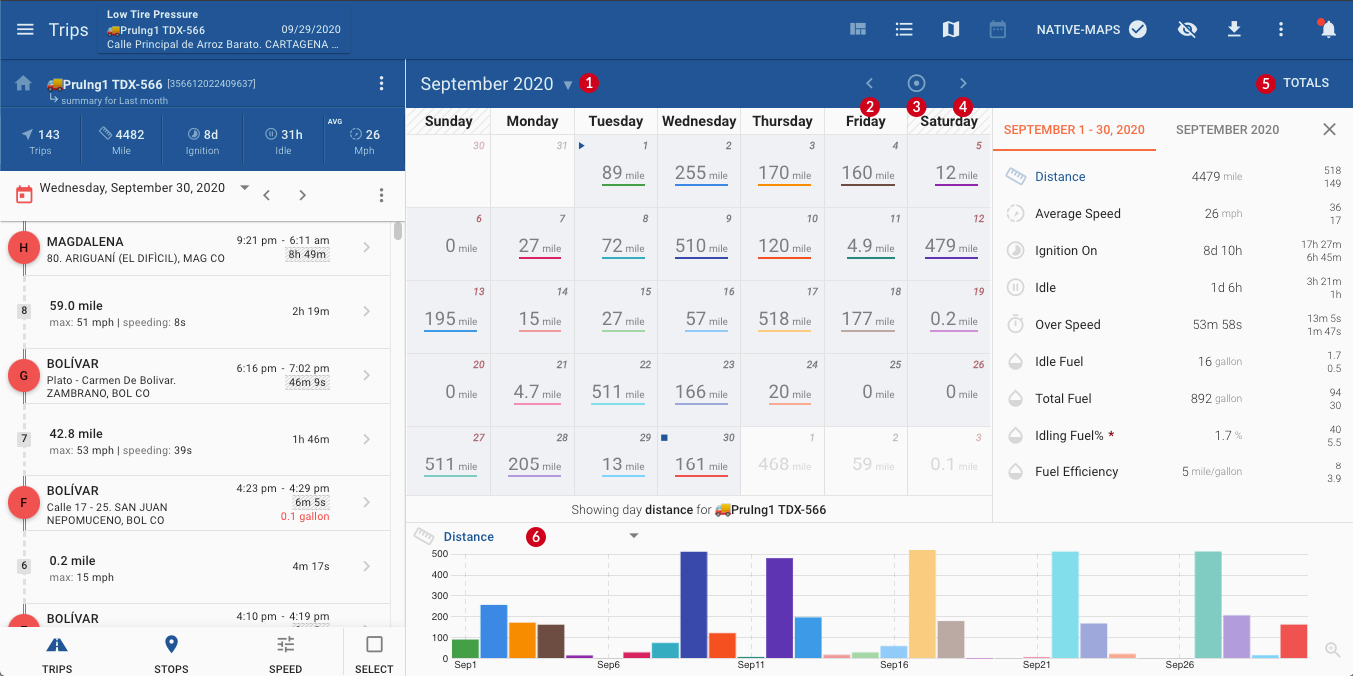
Trips Summary
The summary of the trips list provides a quick overview of the totals for the selected time range. By clicking on the summary, you can expand the list to view all available metrics. You can close the expanded summary by clicking on the arrow icon. When the summary is expanded, you'll find a switch button to hide undefined fields. This allows for a more detailed examination of trip data.
Tip: You can prioritize your most important metrics by clicking on the star icon to favorite them. You can select up to 5 items to be favorited at a time, making it easier to access the key information you need.
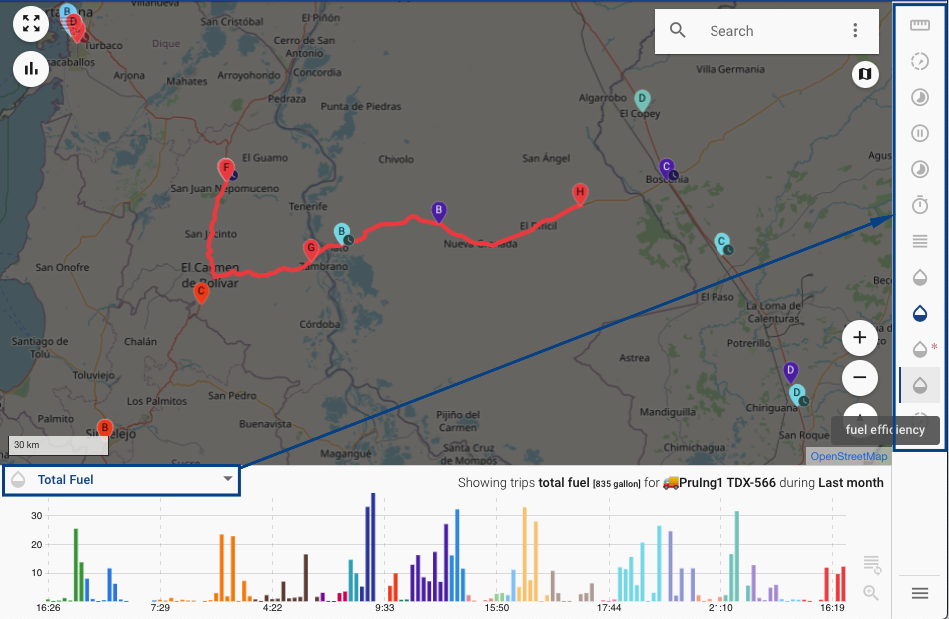
Map
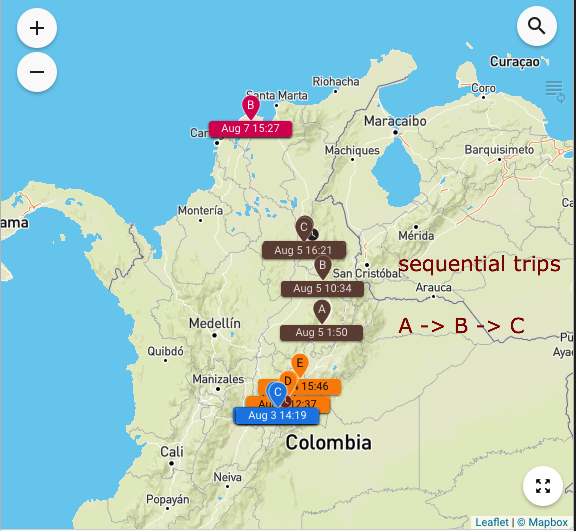
The map displays paths traveled by the entity along with pin markers indicating stops, each marked with a letter representing the sequence of stops made.
The markers and paths are color-coded based on the selected time frame:
- If only one day is being viewed, each trip is assigned a different color.
- If multiple days are selected, a unique color is assigned to each day.
It's important to note that the letters on the stop markers are in chronological order based on their occurrence.
For instance, in the given view, the vehicle traveled on August 5 from point A to B to C during a trip heading north.
Calendar
The calendar feature can be accessed at any time by clicking on an entity and then clicking on the calendar icon next to the date range or from the toolbar.
Once opened, the calendar provides a daily summary of the selected metric. You can choose different metrics, and the calendar will dynamically update to display the information accordingly.
Functions for the calendar feature include:
-
Month selector: Allows you to choose a specific month.
-
Go back 1 month: Navigates to the previous month.
-
Go back to current month: Returns to the current month.
-
Go forward 1 month: Moves to the next month.
-
Show/hide totals for the month or date range selected: Toggles the display of totals for the selected month or date range.
-
Change metrics: Enables you to switch between different metrics for viewing on the calendar.
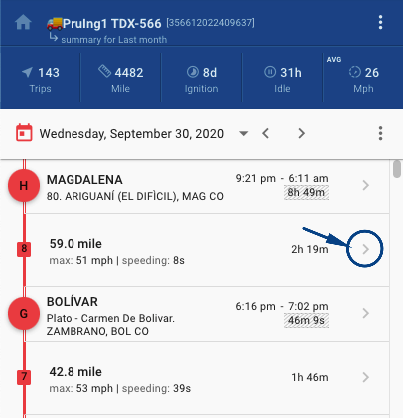
Trip Details (Events View)
You can view the details of the events reported for each trip by clicking on the arrow icon from the list.
Once the details are shown you can color each dot on the map by clicking on the menu icon on the map.
-
Color by day (default): Dots are colored based on the day they occurred, with each day represented by a different color.
-
Color by label: Dots are colored based on the type of event reported, assigning a unique color to each event type.
-
Color by value/range: Dots are colored based on the actual value they represent. For example, in speed metrics, higher speeds may be represented by a different color.
-
Heatmap (density): Dots are colored based on both their value and proximity to neighboring dots, creating a heatmap effect that highlights areas of high density or activity.
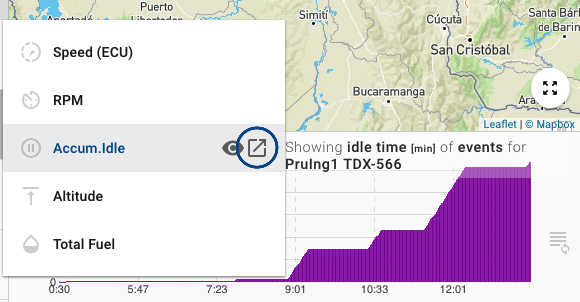
Graphs
The graphs located along the bottom of the trips section are synchronized with the data displayed on the map. This means that you can navigate through different metrics by clicking on them, and the corresponding trips will be loaded accordingly. In essence, the graphs and map are linked, allowing for seamless exploration and analysis of different metrics and their associated trips.

You can also change the metrics with the list of icons on the right-hand side of the page
You can also click on the icon on the bottom right to view the description of each metric.

Graphs can also be hidden with the "Toggle Main Charts" icon on the map:
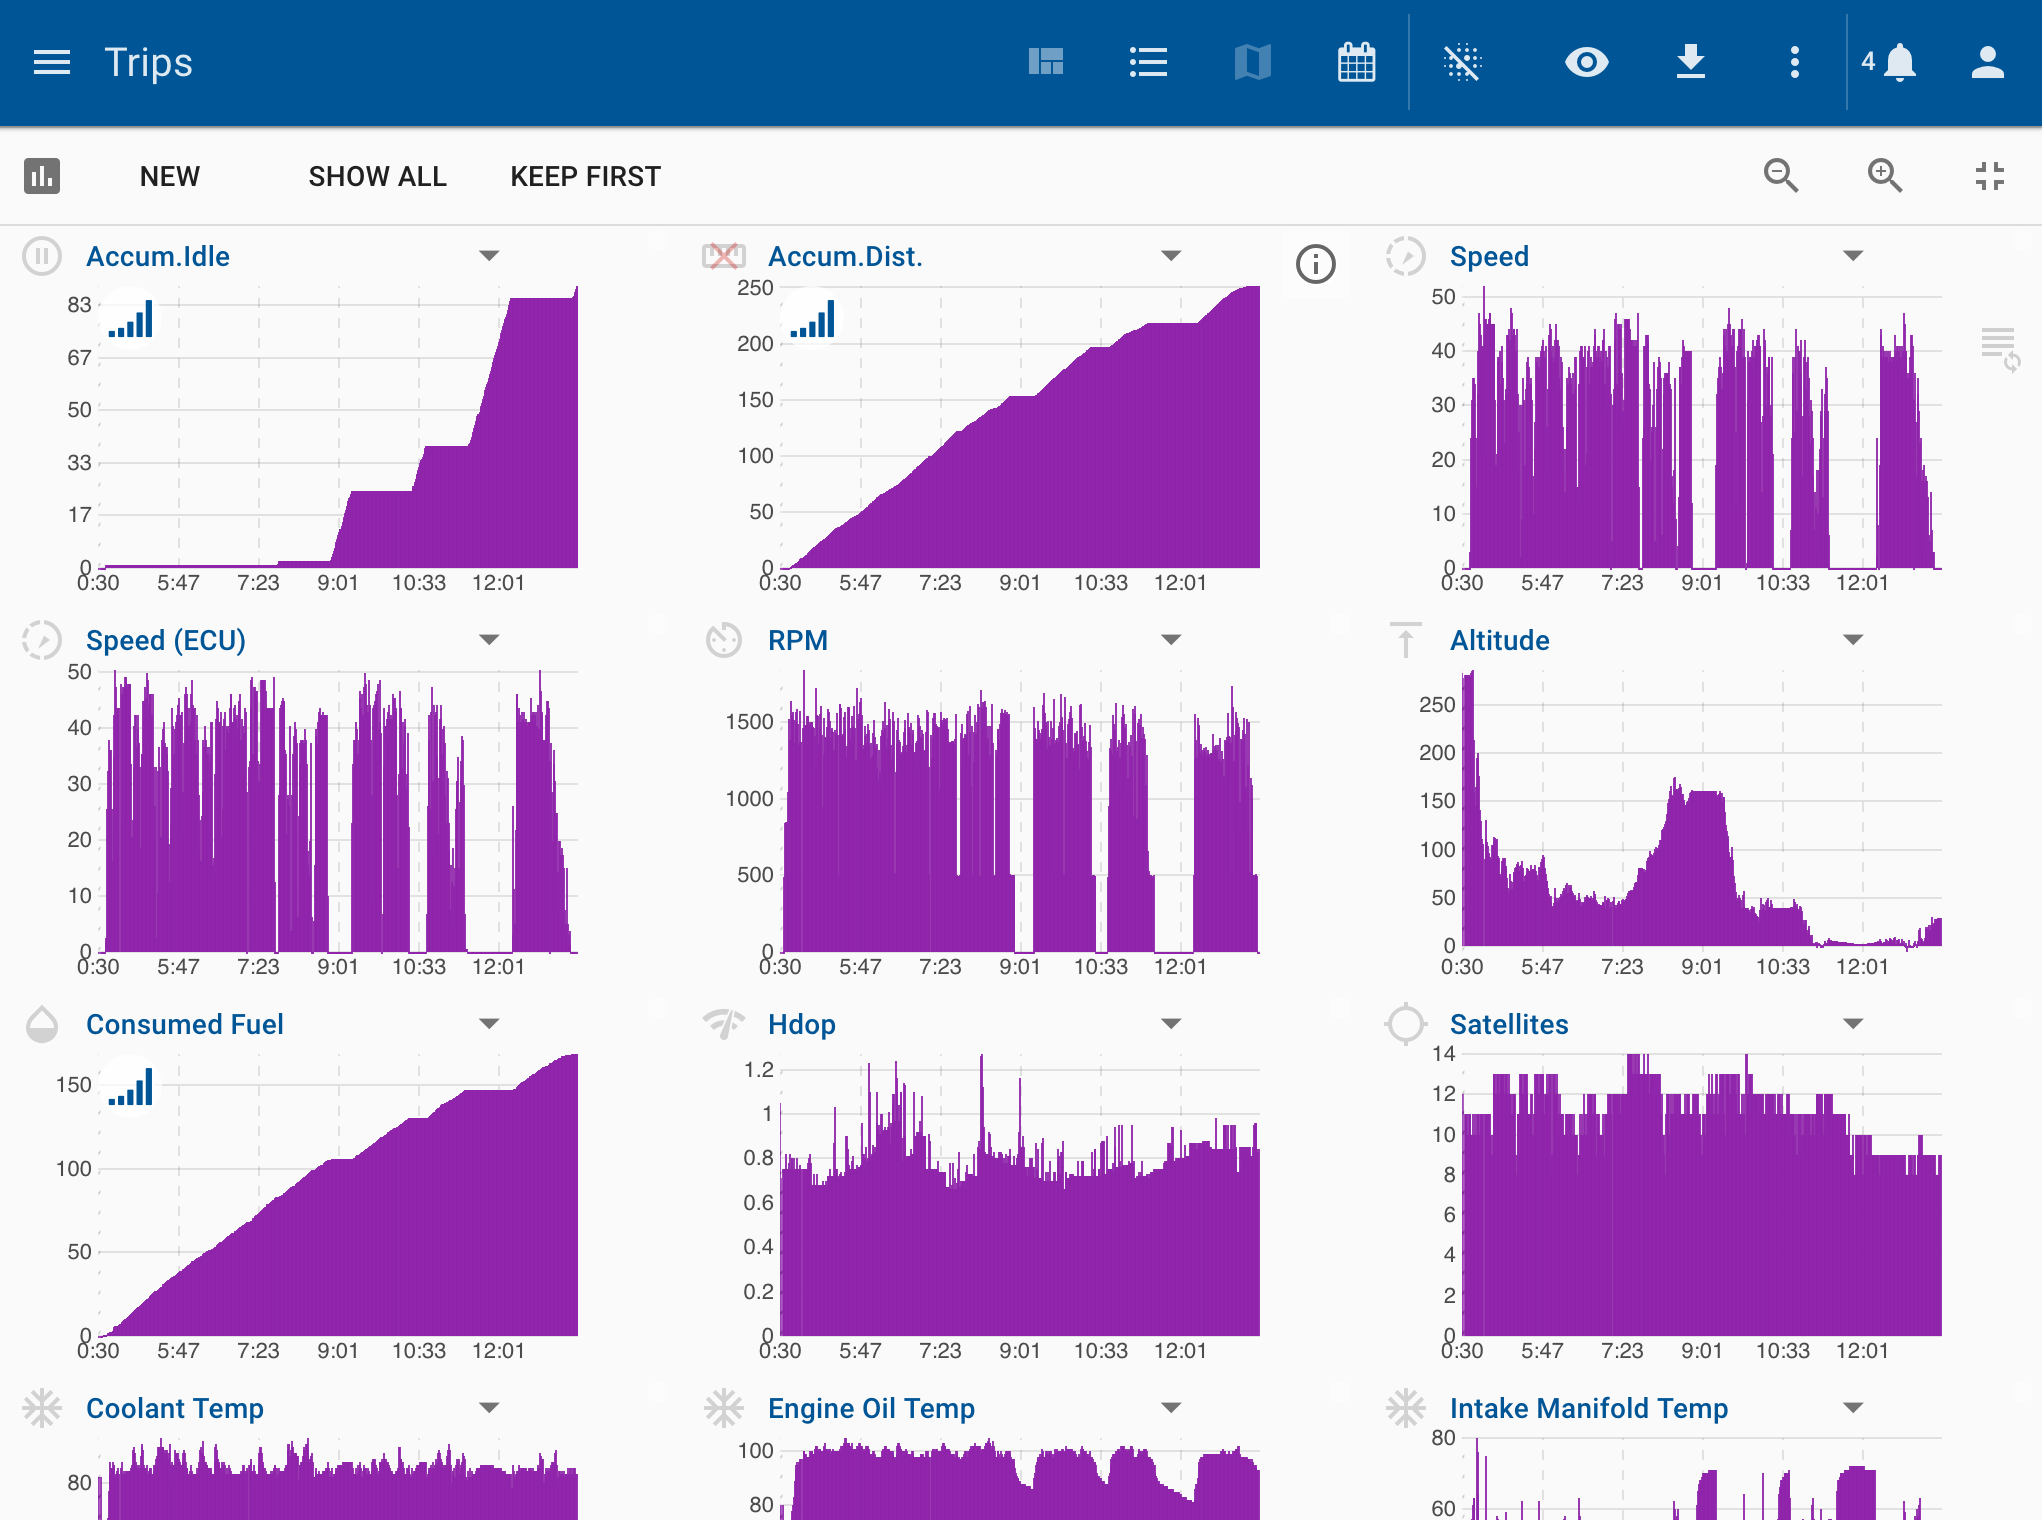
Stacking Graphs
You can stack the metrics graphs by clicking on the icon from the dropdown menu list on the graph.
Once the graphs are stacked, you’ll have the following options to choose.

- NEW: Adds a new graph to the list.
- SHOW ALL: Displays all available metrics.
- KEEP FIRST: Returns to the normal, single-chart view.
- Zoom out: Decreases the size of the graphs.
- Zoom in: Increases the size of the graphs.
- Fullscreen mode: Expands the graph area to fill the entire screen.
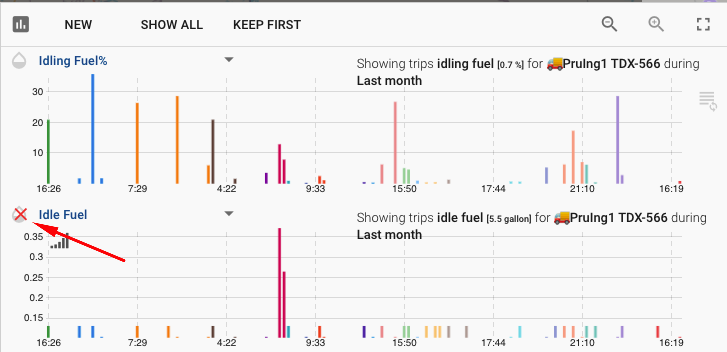
To close a graph, hover over the icon left of its name. A red X will appear; click it to remove the graph.
Heatmaps
To enable heatmaps, navigate to the detailed view of a trip and click the heatmap icon in the toolbar. Heatmaps represent the selected metric with shades of colors, ranging from light blue (lowest) to red (highest). For example, if altitude is selected, red indicates the highest altitude, while light blue indicates the lowest.
For better visibility, remove the trip path by clicking on the trip number.Consider changing the map to black and white for enhanced contrast.
You can adjust the radius of the dots to improve visibility. Additionally, you have the option to customize the range of metrics, such as speed.
Export Trips
You can export trips, stops, or both by checking the checkbox. Alternatively, select the menu icon and use the checkbox icon on the left to select all trips or stops at once.
Exported data can be saved as a KML file or used to create a route from the selected trips.
Updated 8 months ago