Geofences
Geofences, also known as geometric fences, are virtual areas that you can define on a map. They offer a way to add context to the location of an entity. For instance, you can designate specific places on the map by creating geofences. These areas can be employed alongside notifications to alert you when an entity enters or exits a designated area. In tracking, geofences provide valuable insight into the location of your entities. By assigning names to geofences, you gain a clearer understanding of where your entities are situated.
Use Cases
Here are some use cases for utilizing geofences:
-
Vehicle and Fleet Management: Control and manage one vehicle or an entire fleet by monitoring when they enter or exit specific areas defined by geofences.
-
Custom Notifications/Triggers: Set up customized notifications or triggers based on specific statuses and whether vehicles are inside or outside designated geofences. For example, receive alerts for idling in a specific location or when the ignition is turned off inside another area.
-
Employee Tracking: Keep track of when employees enter or leave designated areas such as warehouses or customer locations.
-
Delivery Tracking: Monitor the times that delivery drivers leave or enter specific places using geofences. This enables you to efficiently manage delivery schedules and optimize routes.

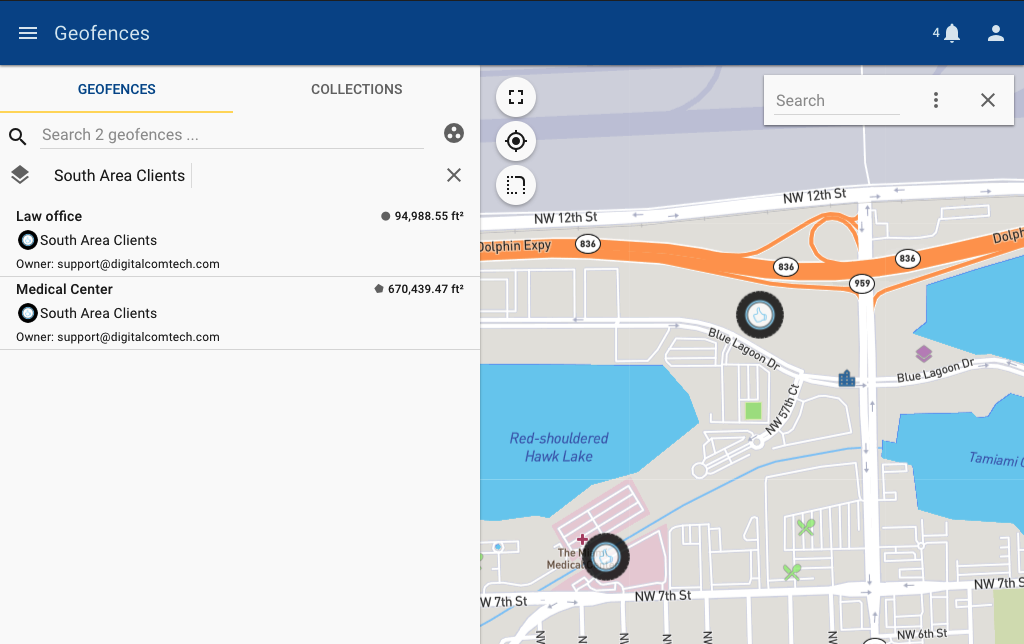
If an entity is inside multiple geofences, the smallest fence is displayed first. You can expand the list by clicking the dropdown arrow, and the remaining geofences (ordered from smallest to largest) will be shown.
Creating a Geofence
-
Access the Map: Navigate to any location where the map is visible on your device.
-
Search Icon: Look for the search icon on the map interface.
-
Click the Search Icon: Tap on the search icon to activate it.
-
Menu Icon: After clicking the search icon, you'll see a menu icon appear on the screen.
-
Click the Menu Icon: Tap on the menu icon to display a menu with options.
-
Select Geofence Shape: From the menu, choose whether to draw a circular region or a polygonal region for your geofence.
Creating Linear Geofences
-
Access Geofence Creation: Click on the following icon to initiate geofence creation:

-
Start Drawing: Click anywhere on the map to begin drawing the linear geofence. You can click multiple points to create a straight line between them.
-
Adjust Options: While creating the geofence, you'll find options displayed on the bottom left of the screen. These options include adjusting the radius of the line and toggling the option to join points via a route on the map. Make necessary adjustments based on your preferences.
-
Complete Geofence: Once you've finished drawing the linear geofence and adjusted the options, you can proceed to save or finalize the geofence creation process.

-
Finalize Drawing: Double click on the last point you've selected.
-
Save and Assign Route: After double-clicking, a dialog box will appear where you can save the route and assign it to a collection if desired. Enter the necessary details and click "Save" to complete the process.
Creating Circular Geofences
-
Access Geofence Creation: Click on the following icon to initiate geofence creation:

-
Click to Start: Click anywhere on the map to start creating the geofence.
-
Press and Drag Outwards: Press the mouse button and drag it outwards from the center without releasing the mouse button. This action determines the size of the circular geofence.
-
Release Mouse Button: After dragging, release the mouse button.
-
Name the Geofence: A dialog will appear prompting you to name the geofence you created. Enter the desired name for the geofence.

Creating Polygonal Geofences
-
Access Geofence Creation: Click on the following icon to initiate geofence creation:

-
Start Drawing: Click anywhere on the map to begin drawing the borders of the geofence you want to create.
-
Finish Drawing: To finish drawing, click on the first point you clicked to close the geofence.
The maximum amount of points a polygon can have is 200.
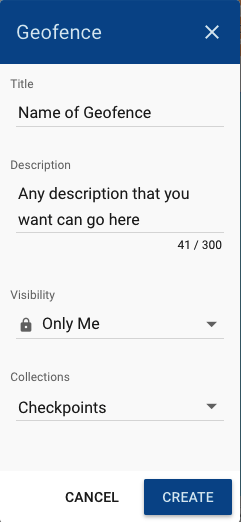
After completing the creation of any geofence, a dialog box will appear. In this dialog box, you can:
- Enter the name of the geofence.
- Add a description for better organization.
- Choose the visibility settings for the geofence, such as public, visible only to people in your group, or private.
- Assign the geofence to one or more collections, which are groups of geofences for better management and organization.
Geofence Menu Options
Edit
To edit geofences, you have two options:
-
Search by Name: Use the Geofence Search box to search for the geofence by its name. Once you find it, you can proceed to edit it.
-
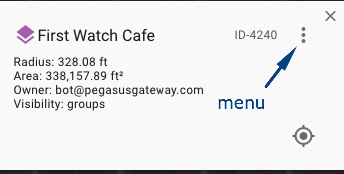
Click on the Geofence: Alternatively, you can directly click on the geofence itself on the map. This action will bring up the Geofence Property Details popup box.
Once you have the Geofence Property Details popup box open, click on the three-dot menu button. From the menu that appears, select the "Edit" option located at the top. This will allow you to edit the geofence details as needed.
While in the Editing section, you can add or modify the following information for the geofence:
-
Name: Update the name of the geofence to better identify it.
-
Description: Add or modify a description to provide additional context or information about the geofence.
-
Owner: Change the owner of the geofence if needed.
-
Visibility: Adjust the visibility settings to control who can view the geofence (public, within your group, or private).
-
Collections: Select one or more collections to categorize the geofence. You can also remove the geofence from any existing collections.
-
Properties: Specify properties such as speed limits or other custom properties associated with the geofence. This can include additional details or attributes about the geofence for better management and organization.
Hide
Hide the actual geofence in the map (make it not visible)
Nearby
Bring a list of the vehicles close to the geofence showing the last time they reported and how far are they from the geofence.
QR Code
QR Code used for “check-ins” with Taurus Application.
Redraw
To modify the size and shape of the geofence itself.
Export
Download the Geofence in a GeoJSON format file.
Share Location
Share geofence’s location via Waze &/or Google Maps
Delete
Permanently eliminates the geofence.
Geofence Collections
Geofence collections consist of one or more geofences grouped together. They can be assigned a specific color and icon for easy identification.
Collections are particularly useful for managing notifications. By setting up a notification to apply to an entire collection, you can avoid the hassle of updating the notification each time a new geofence is created.
Create a Geofence Collection
To create a collection, follow these steps:
-
Access Geofences Module: Navigate to the Geofences module, which can be found in the main menu.

-
Go to Collections Tab: Within the Geofences module, locate the tab labeled "Collections" and click on it.
-
Click on Add Button: Look for the button labeled [icon], typically found at the bottom right corner of the list of collections. Click on it to initiate the creation of a new collection.
-
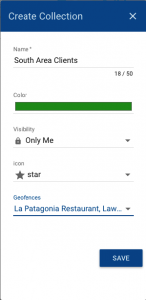
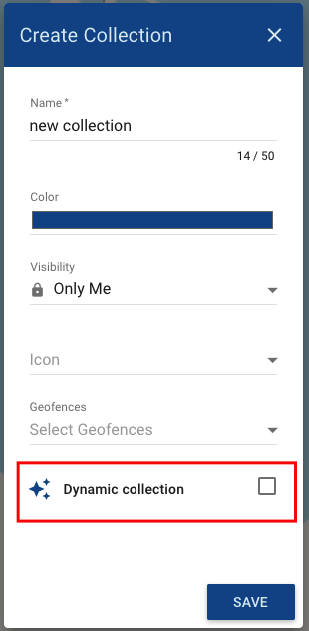
Provide Details: In the creation window, provide the following details for the collection:
- Name: Give the collection a descriptive name.
- Color: Choose a color to represent the collection.
- Visibility: Determine who can view the collection (All users, Group members, or Private).
- Icon: Select an icon to represent the collection.
- Select Geofences: Choose the geofences that belong to this collection.
-
Save Changes: Once you've filled in the necessary details, save the collection to finalize its creation.
Customizing Geofence Collection Icons

To add your own icon, follow these steps:
-
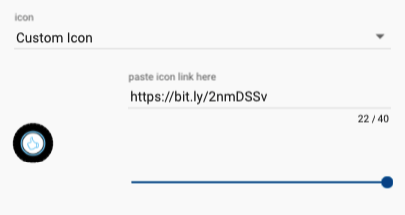
Access Custom Icon Option: Scroll to the bottom of the Icon list and select "Custom Icon".
-
Provide URL: This will open an input field where you can paste the URL to the location of your desired icon. Ensure that the icon is square in dimensions and in either PNG, JPG, or ICO format.
-
Shorten URL (Optional): If the URL is long, you may want to shorten it using a service like bit.ly. Paste the URL into the service, and it will generate a shorter link that you can use. For example, you might have a link like this:
- Original Link: https://cdn2.pegasusgateway.com/images/geofences/sites/1/sample.png
- Shortened Link: https://bit.ly/2nmDSSv
-
Paste Shortened URL: Once you have the shortened URL, paste it into the input field provided.
-
Save Changes: After adding the URL, save your changes to apply the custom icon to your collection.
Editing Geofence Collections
To edit a collection, follow these steps:
-
Access Geofences Module: Navigate to the Geofences module from the main menu.
-
Go to Collections Tab: Within the Geofences module, select the "Collections" tab.
-
Find the Collection: Search for the collection you want to edit.
-
Click on Edit Icon: Once you've located the collection, click on the pencil icon next to it. This will open the collection properties for editing.
-
Edit Collection Properties: In the collection properties, you can edit the following:
- Name: Change the name of the collection.
- Color Groups: Modify the color groups associated with the collection.
- Icon: Update the icon used to represent the collection.
- Add/Remove Geofences: Include or exclude geofences from the collection.
-
Save Changes: After making your desired edits, save the changes to update the collection.
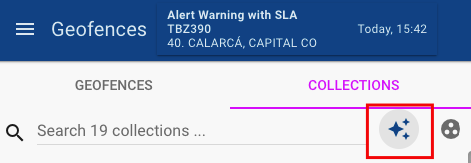
Dynamic Geofences Collections
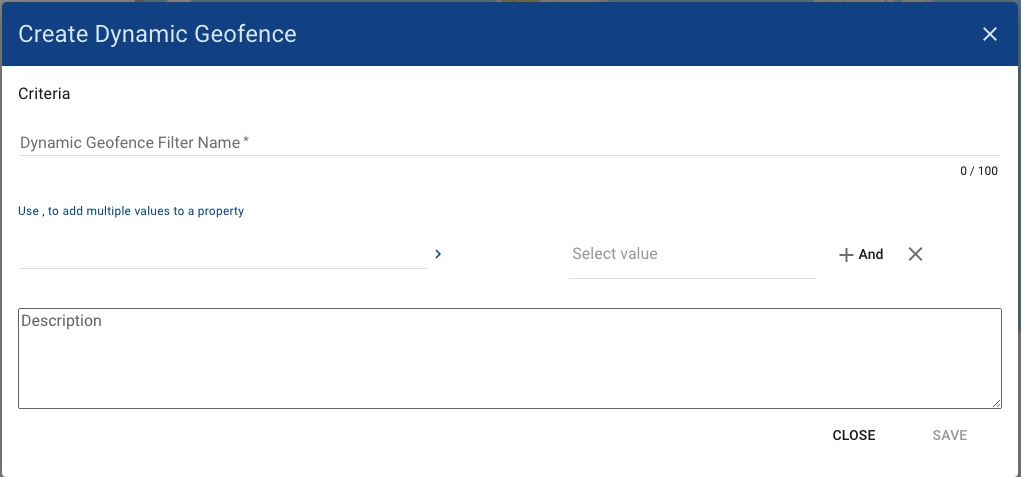
This feature allows you to automatically associate a collection with geofences that have the same properties as that collection. To create a dynamic collection check the dynamic filter and add the properties you need. When click on Save, the geofences with these properties will be part of the collection.
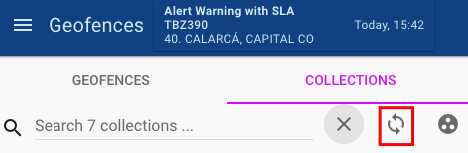
Create/update the geofence properties
When the user creates a dynamic collection, the collections will have all the geofences that match the filter properties. If a new geofence is created with any of these properties or an existing geofence is updated, to sync dynamic collections and geofences, you should filter to show all dynamic collections
and then, click on the Sync button.
Updated 9 months ago